Monday, August 18, 2014

Chocolate Oreo Cupcakes


This was a super easy treat I made up for my kids 'First Day of School Treat'.  It was a super big hit and they were gone in a flash!


Chocolate Oreo Cupcakes

1 Box of Betty Crocker Devil’s Food Cake Mix (along with listed ingredients)
20-25 GF Oreo’s (I use Glutino’s)
1 16 oz. Whipped Cream Cheese Frosting

Directions:
Follow directions on cake mix.  Place cupcake liners in cupcake pan.  Twist the top of an Oreo and place the frosting side up in bottom of the liner.  Reserve all other halves of the Oreo’s for crushing to sprinkle on top of finished cupcakes. Fill each cupcake liner with cake mix until about 2/3 full.  Bake as directed on cake box.

Remove cupcakes from pan and place on a cooling rack.  Crush remaining Oreo cookie halves in a plastic bag. When cooled, frost with frosting and sprinkle with Oreo crumbs.  Store any leftovers in airtight container…if there are any!!


Makes about 16 cupcakes

Wednesday, June 4, 2014

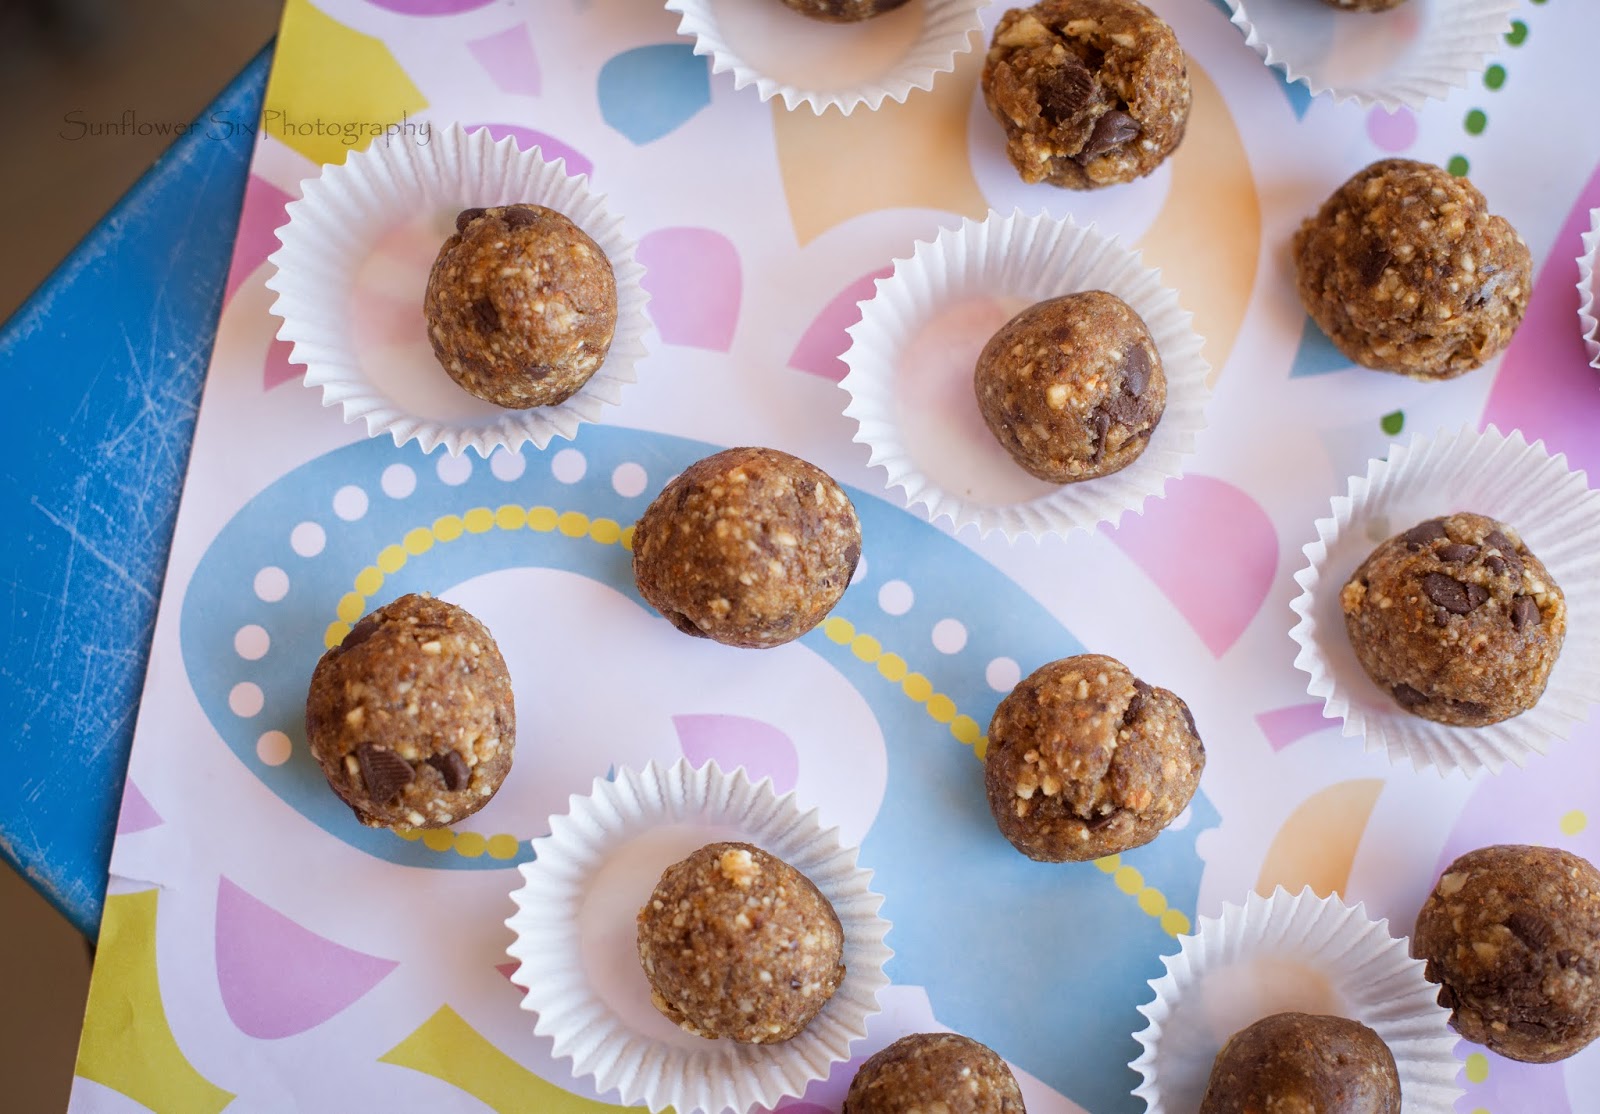
Chocolate Chip Cookie Balls


A friend of mine shared these with our family on an outing one day.  I didn't think for a second that my kiddos would eat one let alone love them!  They are super easy to make and very tasty.  They curb that sweet tooth desire, but are more on the healthy side!  The original recipe comes from here.


Chocolate Chip Cookie Balls (Lara Bar Copycat)

 2/3 cup pitted dates
A handful of chocolate chips or Sugar-Free Chocolate Chips
1/4 cup cashews (or another nut, like almonds.)
1/4 tsp pure vanilla extract
A tiny pinch of salt (can be omitted)

Blend all ingredients together in a food processor or a blender.  Scrape out and knead together with your hands.  Gently fold in chocolate chips.  Roll into tiny little balls and place on a cookie sheet lined with parchment paper.  Freeze for about a half an hour.  Bag up cookie balls in freezer bag and store in freezer until ready to eat. 


Try not to eat the whole bag!

Friday, March 14, 2014

Strawberry Rhubarb Crumble Pie

 Today is Pi day and I wanted to surprise my husband with his favorite pie, Strawberry Rhubarb.  Let's just say that it looks good, smelled amazing while baking and was super delicious!  I scoured the internet for recipes, (I'm a huge visual kind of person, so I was looking for a picture of a pie that looked yummy!).  I found two recipes that looked easy and good and combined them. I did take the easy road and just bought a a GF pie crust and the rhubarb came from our garden that we harvested last year.  Go ahead ans wipe the drool of your face! Happy Pi day!


Saw this somewhere in my search for this recipe...grate the butter instead of cutting cubes.  It blends up so much easier!


That beautiful rhubarb came from our garden!


Pie before going in the oven...


Strawberry Rhubarb Crumble Pie

For the crust:

I used Pillsbury Gluten Free Pastry Dough located in the refrigerated section ( I got mine at Walmart) and followed the directions on the packaging.

For the filling:

1 pound fresh strawberries (washed, dried, and cut into quarters...or halved if small)
1 pound fresh rhubarb (washed, dried and cut into 1/2 inch chunks)
1 cup  sugar
2 tablespoons cornstarch
1 teaspoon vanilla 
1 tablespoon  lemon juice
A pinch of sea salt

For the crisp topping:

1/2 cup butter, cut into chunks (I actually grated mine while it was frozen)
1/4 cup GF flour
1/4 cup brown sugar
1/4 cup GF quick oats
1 tsp. cinnamon

1.  Preheat your oven to 375 degrees F. Line a baking sheet with parchment or foil and set aside. This is used to catch any spill overs during cooking!
2. Roll out your GF pie crust per directions on the package and place in your 9” pie dish.
3. Chop up your rhubarb into 1/2 inch chunks and cut your strawberries into quarters or halves if on the smaller side. Toss in a bowl with your sugar, cornstarch, vanilla extract, lemon juice and salt. Pour into your 9" pie dish with prepared GF pie crust.

4.  Combine all ingredients for the crumble and mix until well blended.  Pour on top of Rhubarb mixture and place in oven on your pan lined with tin foil.  Bake for 40 minutes.  Remove and serve warm with some vanilla ice cream!

Thursday, February 20, 2014

Chocolate Crinkle Cookies

I had a friend share one of these with me today and I immediately came home and busted out a batch that was gluten free.  They are super easy, super fast to whip up and they are DELICIOUS!!
The recipe I used is from Williams-Sonoma and all I did was change out the flour to be GF.


Chocolate Crinkle Cookies

½ C powdered sugar
1 2/3 C GF flour
1 ¼ tsp xanthan gum
½ C cocoa powder
1 ½ tsp baking powder
¼ tsp salt
½ C butter at room temp
1 ¼ C sugar
2 eggs
 ½ tsp vanilla

Preheat oven to 350 degrees.

Cream together sugar and butter. Add one egg and blend together.  Add second egg and vanilla and blend together. Add dry ingredients except for powdered sugar. Beat on low just till blended.  Roll into 1-2 inch balls and then roll each ball in the powdered sugar.  Place on greased or parchment lined cookie sheet.  Bake @ 350 degrees for 10-12 minutes.  Remove from oven and place onto cooling rack for a few minutes and then store in airtight container if there are any leftovers!

Monday, November 18, 2013

Ranch Mac-n-Cheese

A big bowl of comfort food on a cold day is the best.  My family has enjoyed this meal a few times in the past few weeks and the leftovers are pretty tasty too!  I found this recipe here.


Ranch Mac & Cheese

Ingredients

1 package (16 oz.) GF elbow macaroni
1 cup milk
1/4 cup butter, cubed
1 envelope ranch salad dressing mix  (or 3 TBS of dry ranch powder)
1 teaspoon garlic salt
1 teaspoon garlic pepper blend
1 teaspoon lemon-pepper seasoning
1 cup (4 oz.) shredded Monterey Jack cheese
1 cup (4 oz.) shredded Colby cheese
1 cup (8 oz.) sour cream (I used heavy cream)
1/3 cup grated Parmesan cheese

Directions

1. Cook macaroni according to package directions, however, do NOT use salt in the pasta water.

2. Meanwhile on stove top, combine the milk, butter, dressing mix and seasonings; heat through. Stir in Monterey Jack and Colby cheeses until melted. Stir in sour cream or heavy cream.


3. Drain macaroni, stir into cheese sauce, then sprinkle with Parmesan cheese.

Tuesday, October 22, 2013

Taco Soup

I have never been a fan of taco soup, until now!  I had a friend share this recipe with me and the whole family LOVES it!  I think it something to do with Hormel Chili in it, our favorite canned chili.  I usually have to double it for my family of six, giving me a little bit of leftovers for lunches the following day. The recipe comes from here.  It calls for chicken, but I have left that out and just added an extra can of black beans when I make this.  Doing it this way also makes for a quick prep time if you want to do it on the stove top.


Slow Cooker Chicken Taco Soup

Ingredients:
1 onion, chopped
1 (16 ounce) can chili beans (I use Hormel Chili with beans)
1 (15 ounce) can black beans
1 (15 ounce) can whole kernel corn, drained
1 (8 ounce) can tomato sauce
1 C Beef Broth
1 (10 ounce) cans diced tomatoes with green chilies, undrained
1 (1.25 ounce) package taco seasoning
3 whole skinless, boneless chicken breasts (I make it without the chicken and add one more can of black beans.)
shredded Cheddar cheese (optional)
sour cream (optional)
crushed tortilla chips (optional)
cilantro (optional)
fresh lime juice (optional)

Instructions:
1.         Place the onion, chili beans, black beans, corn, tomato sauce, broth, and diced tomatoes in a slow cooker. Add taco seasoning, and stir to blend. Lay chicken breasts on top of the mixture, pressing down slightly until just covered by the other ingredients. Set slow cooker for low heat, cover, and cook for 5 hours.
2.         Remove chicken breasts from the soup and shred. Stir the shredded chicken back into the soup. Serve topped with shredded Cheddar cheese, sour cream, and crushed tortilla chips cilantro, and lime juice, if desired.

Monday, September 30, 2013

Sweet and Sour Meatballs

One of the things I love about this recipe is that it is one I can stock up in the freezer with. I will buy about 5 1/2 pounds of ground beef and make it all into meatballs (Adjust the recipe accordingly). I make mine about the size of a golf ball and fill a cookie sheet or two and freeze them for about an hour. At that point I bag them up in freezer bags and voila , I now have at least five or six meals that I can pull out and all I have to do is make up the sauce and rice!


Sweet and Sour Meatballs

1 to 1 1/2 pounds ground beef
3/4 cup GF rolled oats
2 eggs, slightly beaten
1/2 cup finely chopped onion
1/2 cup milk
1 teaspoon salt
A pinch of pepper
1 teaspoon GF Worcestershire sauce

Combine all ingredients; mix well. Form into balls. Place in sprayed casserole dish. Cover with sauce (below). Bake at 350 degree for about 30 minutes. Makes 6 to 8 servings, Serve over rice and with a veggie or salad on the side.

Sauce
1/2 cup brown sugar
1/4 cup vinegar
1 teaspoon prepared mustard
1/4 cup GF BBQ  sauce
1 teaspoon GF Worcestershire sauce

**I have started adding chopped green and red peppers and pineapple to our meatballs to give it some color.  Add to your liking...

Combine ingredients and blend thoroughly. Heat and pour over meatballs.

** I also double the sauce because I like mine saucy.

Thursday, September 26, 2013

Mini Pumpkin Cakes

Fall is in the air and at the moment it feels great!  I wish we could bottle this temperature for several months!  I saw this recipe posted on Facebook  which lead me to Picky Palate and had to try it.  I do love her blog and have tried many of her recipes.  For the first time ever, I did not have any ice cream in my house, but still wanted to try these.  I just used heavy cream instead.  They turned out really well, which only means that doing it with melted ice cream must be amazing! I also do not have a doughnut pan, so I just made mine in my mini bundt pan.  This recipe made 10 mini pumpkin cakes.  Would definitely double it next time.


Mini Pumpkin Cakes

Ingredients:
3/4 cup GF featherlite flour 
½ tsp xanthan gum
1 tablespoon baking powder
1/4 teaspoon kosher salt
1/2 teaspoon ground cinnamon
1/4 cup granulated sugar
1/4 cup plus 2 tablespoons canned pumpkin
1 large egg
1 teaspoon vanilla
2 tablespoons instant vanilla pudding mix
3/4 cup vanilla ice cream (measured before melting) (I used heavy whipping cream)

Glaze:
1/2 cup powdered sugar
1/4 cup heavy cream (you may need a couple tablespoons more if too thick)

Directions:
1. Preheat oven to 350 degrees F. and spray mini bundt pan or doughnut pan with non-stick cooking spray.
2. Place flour, xanthan gum, baking powder, salt, cinnamon, sugar, pumpkin, egg, vanilla and pudding mix into a large mixing bowl.
3. Place ice cream into a microwave safe bowl and heat for 30 seconds or until just barely melted. Pour into mixing bowl and combine with other ingredients until well combined. Scoop batter into prepared doughnut or mini bundt pan. Bake for 15-20 minutes, until baked through. Remove and let cool for 10 minutes before removing from pan.

4. To prepare the glaze, place powdered sugar and cream into a bowl, whisking to combine. Add more cream if needs thinning out. Dip tops of donuts or mini cakes in glaze and serve!


Makes 9-11 donuts or mini bundt cakes

Monday, September 16, 2013

Green Chili Chicken

Looking to add a little kick to your chicken?  This has good flavor but not too spicy and hot.
I changed the directions up a bit, but the original recipe came from here.


Green Chili Chicken

4 boneless, skinless chicken breasts
 1 1/2 cups shredded pepperjack cheese
 1 (4 ounce) can diced green chile peppers, drained
 1/2 packet dry GF fajita seasoning

Directions: 
Preheat the oven to 350 degrees F (175 degrees C). Coat a 9 inch square baking dish (or similar size) with cooking spray. Place fajita seasoning in a plastic bag.  Add chicken and shake to coat.
Place chicken into the baking dish and top with green chilies. Bake uncovered for 20 minutes in the preheated oven. Remove baking dish from oven. Drain juices, and top with pepperjack cheese.  Return to oven and bake for 10-15 more minutes or until cheese is melted and browned slightly. Remove and serve.

Wednesday, September 4, 2013

Homemade Instant Oatmeal

I have tried a lot of things to make GF oats taste good and have failed miserably! I came across this recipe per pinterest and was surprised at how much my whole family loved it! I only made a small amount the first time around to make sure it was a keeper, and it definitely is! This is what we have had for breakfast everyday for a week now, which says a lot!  I love that is doesn't have all the added 'stuff' they put in our food these days....


Instant Homemade Oatmeal


6 cups GF quick rolled oats (Bob’s Red Mill)
1 cup dry milk powder
3/4 cup brown sugar
1 tablespoon ground cinnamon
1/4 teaspoon ground cloves
1/2 teaspoon allspice (I did not have / use this)
1 teaspoon salt

1) Combine all ingredients in a large bowl.

2) Mix well.

3) Store in a large container. Label and date. Keep in a cool, dry place for up to 6 months (it never lasts that long at our house, but good to know anyways).
Directions for use: Shake the container to mix ingredients. In a small pot, heat 2/3 cup water to boiling. Add 1/3 cup oatmeal mix. Note: There is approx. 1/3 cup of oatmeal in a packet of instant oatmeal. You may prefer to increase this amount based on the size of servings needed. Reduce heat and cook for 4-5 minutes, or until desired consistency is reached, stir frequently. Can also heat in microwave for one minute.

This is just a base (which tastes amazing by itself!), but you could easily add in any additional dried fruit, fresh fruit or maple syrup.

Sunday, August 18, 2013

Chocolate Quinoa Cake

I seriously doubted this recipe when I first came upon it.  I have struggled getting anyone in our household to eat quinoa, let alone in a cake.  It got rave reviews, so I thought what the heck!  It definitely is a process to make, not one you just whip up in an hour.  Having said that, it was a huge hit.  I even took it to a friend to be a taste tester for me.  They had no idea the ingredients, but it was loved by all who ate it.  It is a very rich cake.  One slice hits the spot!  This was a pinterest find that led me here.  I have tried a few of her other recipes and have always been happy with the results!


Chocolate Qunioa Cake
INGREDIENTS:
Cake:
2 cups cooked and cooled quinoa (see note below)
1/3 cup milk
4 large eggs
1 teaspoon pure vanilla extract
3/4 cup butter, melted and cooled
1 1/2 cups granulated sugar
1 cup unsweetened cocoa powder
1 1/2 teaspoons baking powder
1/2 teaspoon baking soda
1/2 teaspoon salt
Frosting:
2 1/4 cups heavy whipping cream
1 1/4 cups semisweet or bittersweet chocolate chips ( I actually cut this down to about a 1/4 C and I use milk chocolate chips)

DIRECTIONS:
For the cake, preheat the oven to 350 degrees F. Lightly grease two 8-inch round cake pans. Line the bottoms of the pans with parchment paper.
Combine the milk, eggs and vanilla in a blender or food processor. Process just until combined. Add the cooked quinoa and the butter. Blend well until smooth.
In a large bowl, whisk together the sugar, cocoa, baking powder, baking soda and salt. Add the contents from the blender and mix with a wooden spoon or whisk until combined.
Divide the batter evenly between the two pans and bake on a rack in the middle position for 28-30 minutes or until a knife or toothpick inserted in the center comes out clean. Remove the cake from the oven and cool for 10 minutes. Invert the cakes onto cooling racks (remove the parchment paper stuck to the bottom of the cakes).
For the frosting, place the chocolate chips in a medium bowl. Heat the whipping cream in a saucepan until it gently simmers. Pour the hot cream over the chocolate chips and let the mixture sit for five minutes. Whisk to combine until it is glossy and smooth. Cover the bowl with plastic wrap and refrigerate until completely chilled and cold (2-3 hours). You can speed up this process by placing the bottom of the bowl in an ice water bath and stirring until cool. When fully chilled, use an electric mixer (stand mixer or handheld) to whip the mixture to soft peaks. (This takes at least 10-15 minutes to get thick and stiff)
Place one cake layer upside down on a serving platter or plate. Top with a generous portion (about half) of the whipped frosting, spreading to within 1/2-inch of the edge of the cake (it will press to the edge when the top cake layer is put on).
Gently put the other cake layer upside down on top of the frosted layer. Spread the remaining frosting over the top of the cake. You could definitely frost the sides, too, but I like the more rustic look for this cake - frosting just the middle and top.
Chill the frosted cake in the refrigerator for at least 2 hours before serving to let the frosting set up a bit.

You'll need about 3/4 cup  dry quinoa for 2 cups cooked. Make sure to measure the quinoa for the cake recipe after it is cooked and cooled. Also, make sure to THOROUGHLY rinse the quinoa and cook the quinoa in water not broth.

Tuesday, August 13, 2013

Sugar Cookie Squares

Who doesn't love a soft sugar cookie?  I have not found pleasure in trying to 'roll' out sugar cookie dough since going GF, so this is something I put on the back burner.  Then one day, I saw a pin on pinterest called 'Sugar Cookie Bars'.  You just spread the dough out onto a cookie sheet and bake the whole thing at once and then frost, cut and serve!  Well, duh, why didn't I think of that?!  I pulled out my old favorite recipe from back in the day and viola, we have yummy sugar cookies....all shaped like squares!  It was a good day.  The first time I made it using the full recipe and the cookies were like cake thickness.  A bit much for me, so the second time, I halved the recipe and they were much thinner (as pictured below).  So pick what suits your fancy and enjoy!


 Sugar Cookie Squares

½ cup shortening or butter
1 ½ cups sugar
2 eggs
1 cup sour cream
1 tsp. vanilla
½ tsp. baking soda
1 tsp. salt
1 ½ tsp xanthan gum
3 cups GF flour


Cream together shortening, sugar and eggs.  Add remaining ingredients.  Spread dough out onto greased cookie sheet. (One with sides)  Bake at 375 degrees for 10-12 minutes; until light golden brown on top.

Frost with your favorite frosting.  I use Betty Crocker Cream Cheese flavored frosting.

Saturday, August 10, 2013

S'mores Pizza Dessert

 I was asked to take dinner into a family tonight.  With all that was going on, it was just easier for me to stop at Papa Murphey's Take-n-Bake and grab them dinner.  I saw that they had a s'mores dessert pizza and I thought to myself, "Wow, that looks amazingly delicious!"  I think I could totally make that GF!  When I got home, I googled s'mores pizza and found several recipes.  I chose one that looked good and ran with it!  It was seriously a hit with my family and the guests we were feeding at our home tonight!  The only thing I would have changed is maybe drizzling a little bit of chocolate syrup over the pizza.  All in all, we will be making this again!  The recipe I went with came from here.


If you only want to make the dessert pizza, then 1/2 a pizza dough recipe would make just that.  Lately we have been doubling the dough recipe  and making two large dinner pizza's with enough dough left over to make a dessert pizza.

S’mores Pizza Dessert

Ingredients:

½ GF Pizza dough recipe (this will make a medium/large size dessert pizza)
1/3 cup Brown Sugar
1/2 cup GF Rolled Oats
2 tablespoons Softened Butter
1/4 cup GF Flour
Mini Marshmallows
Semi-sweet chocolate chips (we like and use milk chocolate!)

Directions:

Prepare crust as you normally would. Spread the dough out on a pizza stone.  In a medium sized bowl, combine flour, brown sugar, and butter with a fork until you have corn meal consistency.  Mix in the rolled oats.  Sprinkle this mixture across your pizza crust liberally. Add chocolate chips onto crust.  Bake pizza crust as directed.
Bake Pizza at 420 degrees for about 12-15 minutes, then add marshmallows and finish cooking for 5-7 minutes.  Remove from oven, slice and serve. 


***Next time I would totally drizzle chocolate syrup over mine before serving.

Tuesday, June 25, 2013

Bacon Ranch Potatoes


This is a new twist on funeral potatoes or potato casserole.  I wasn't sure the hubs was going to like it because he is not much of a ranch fan, but to my surprise he quite liked them as did I.  They were super easy to throw together. This made enough to feed our family of six with one serving of leftovers. I found the recipe on pinterest, but when I went back to link to it, the site wouldn't work.  I modified it quite a bit from the original and it worked out well for our family.  Just a side note, our family's new favorite vegetable...edamame beans!


Bacon Ranch Potatoes

2 C sour cream
2 C cheddar cheese, shredded
7-9 strips bacon cut and cooked (I use turkey bacon)
3 TBS dry Ranch powder
4-5 C frozen shredded hash browns


Combine first 4 ingredients, mix in hash browns. Spread into a sprayed 9x13 pan. Bake covered at 400 degrees for 45-60 minutes. 

Chocolate Dipped Banana Popsicle

My sister brought me some Popsicle molds from Ikea when she came to visit, so we did a search for something yummy to make in them.  I am a huge fan of the hand dipped bars at Costco and this was a close second, only difference is the hint of banana flavor.  When dipping the Popsicle in the magic shell, you have to be very quick and you can't double dip it or all the chocolate comes off. 
The recipe came from pinterest.


Chocolate Dipped Banana Popsicles

Ingredients

2 medium sized bananas
1 cup heavy cream
1/2 cup milk
3 tbsp sugar
1 tsp vanilla
Popsicle Mold
1/2 cup unsalted chopped peanuts

Instructions

Put bananas, heavy cream, milk, sugar and vanilla in the blender and blend until smooth, about 1 minute. Pour into your popsicle mold and place in freezer.
Once frozen, remove from mold and dip into the chocolate Magic Shell, then quickly sprinkle with chopped nuts. Enjoy right away, or place in plastic bags and store in freezer until ready to enjoy.